
Hard Gel Manicure With A Negative Apex - Step By Step!
How I Do My Nails Now!

I’ve been doing my nails a little bit differently recently which you might have seen from the past few months of posts. I thought today’s post would fun to walk you through the steps and products I am loving using currently!
What’s really different about how I’ve done them in the past? I have been loving using hard gel to reconstruct my natural nails to reinforce them, keep them strong, and supportive for a really natural look! I’ve learned more about nail anatomy and negative apex technique with hard gel, and I just love how it looks and feels.
I’m working on all new content to teach you exactly how to use these products in video format that’s coming soon! If you want to be notified when it’s live, make sure you’re subscribed here!

The main things I’m keeping in mind during this manicure are:
Thorough prep and thin application to prevent lifting
Precise yet gentle cuticle work
Finish filing and refining the shape
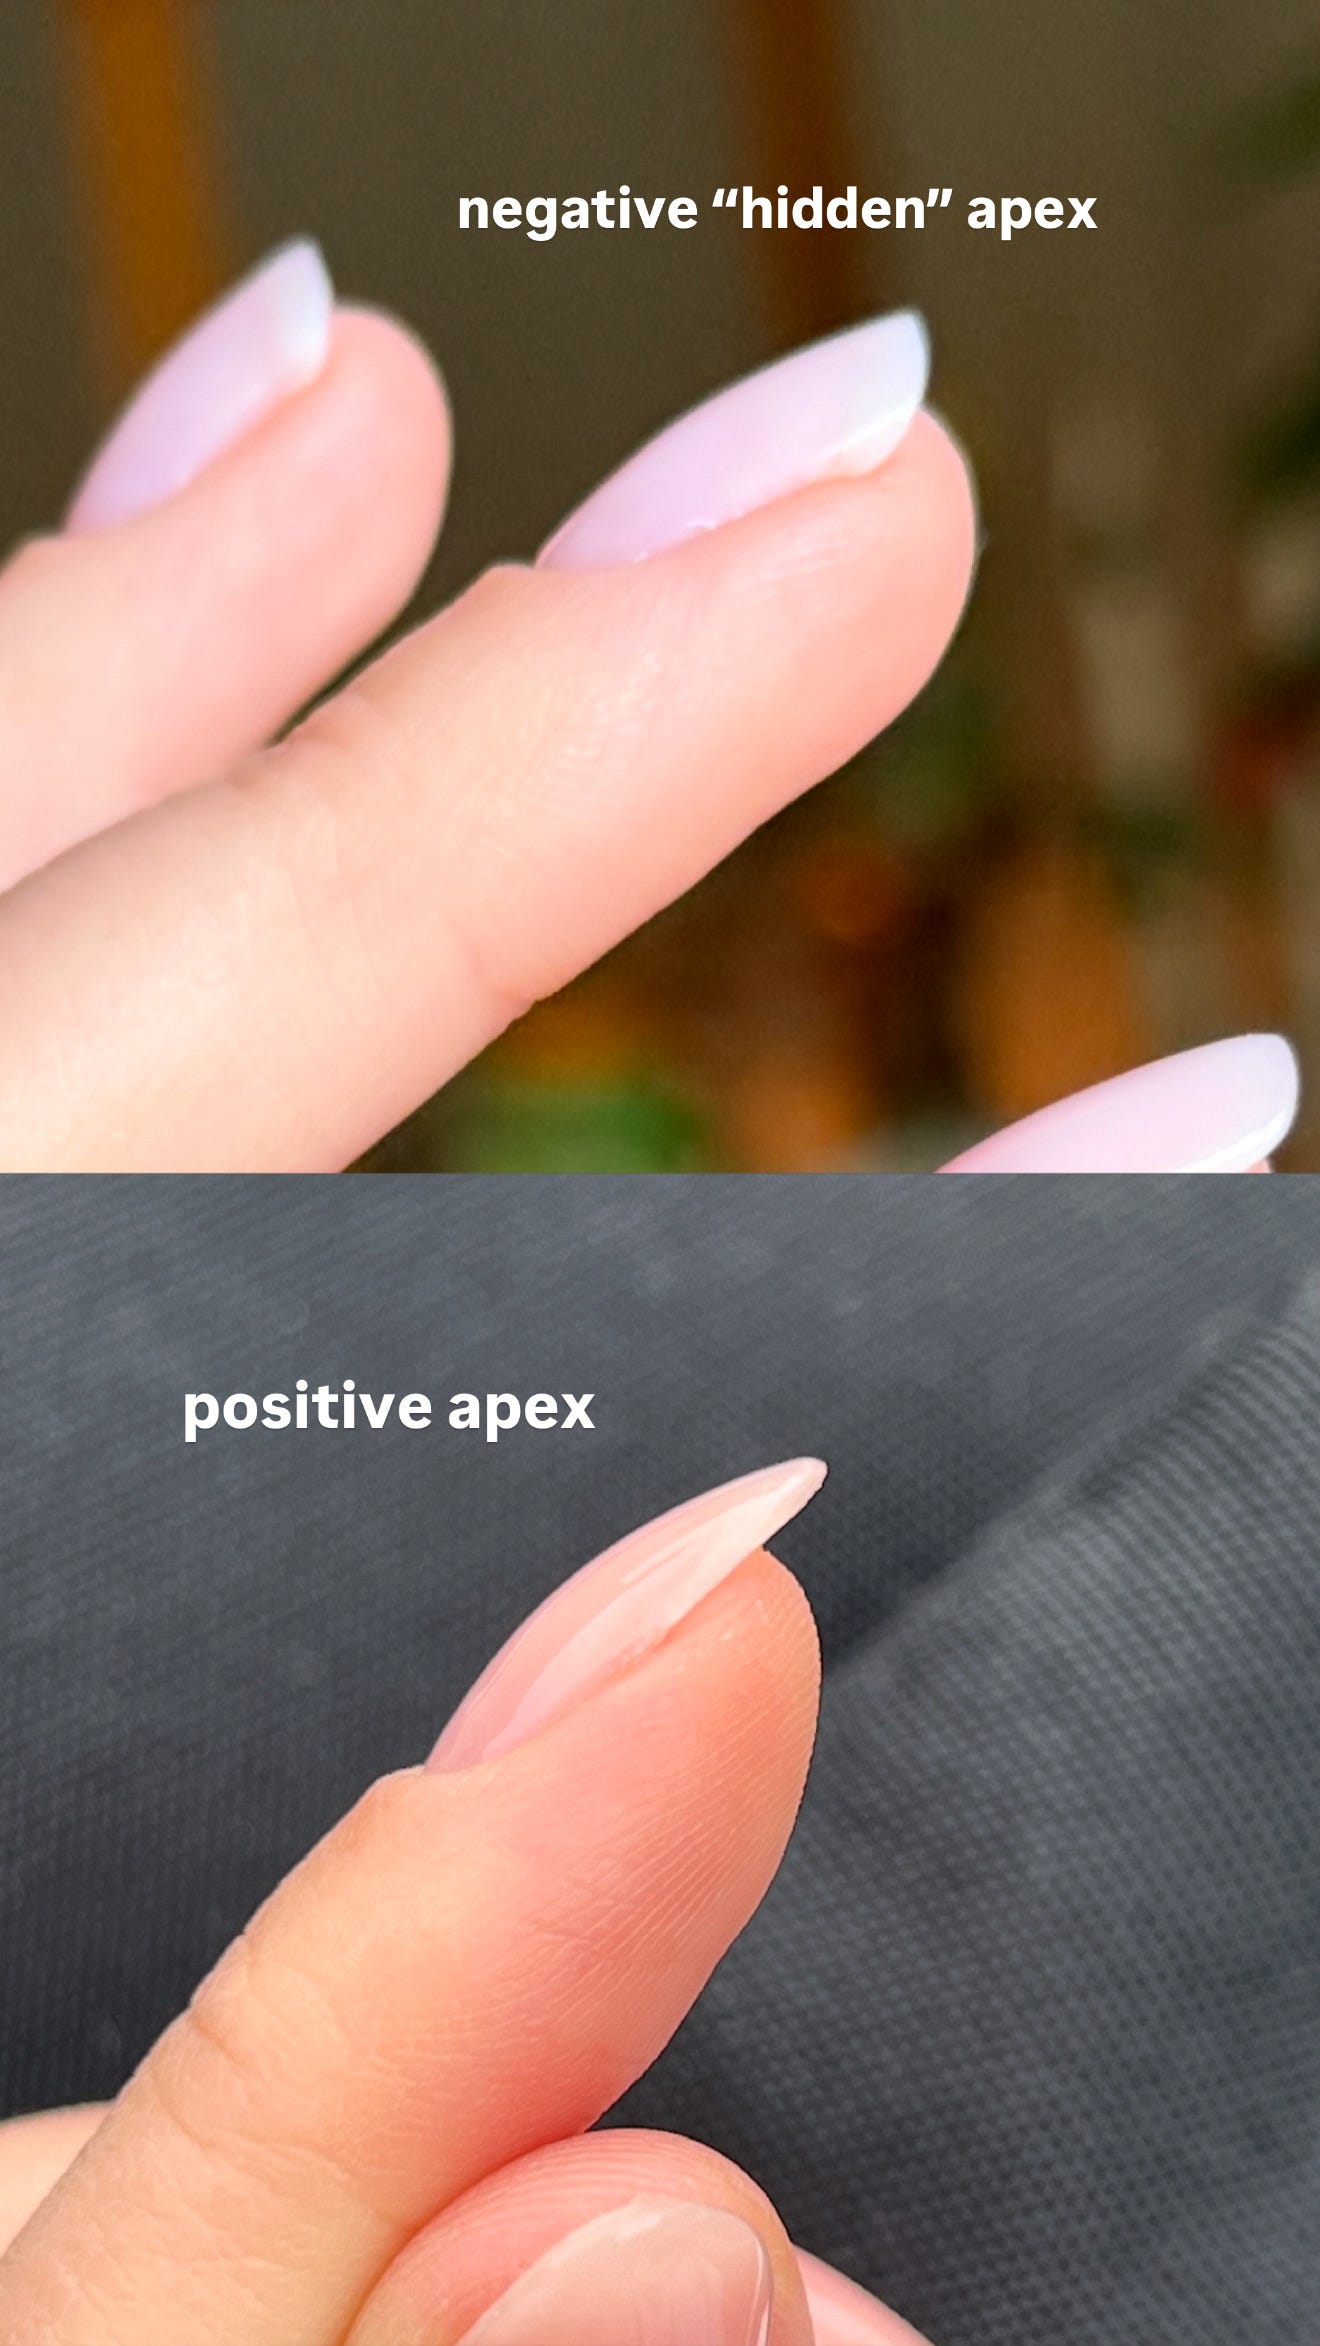
Reconstructing or repairing my nails for a supportive shape with a negative or hidden apex!
A negative apex is the opposite of a positive apex which is what you might traditionally picture when you think of an apex with builder gel!
Instead of using a bead of polish to build the overlay and add bulk on the stress area of the nail, a negative apex uses hard gel to make corrections on the nail before doing the overlay, and almost fills in those areas so the nail is still supported and strong, but doesn’t have as pronounced of a stress area!
I will teach how to do this process in detail in my new classes! Make sure you sign up to be notified at the end of the email

Okay let’s get the steps! Ps -You can find all of the products & tools I used HERE!


Rebalance & Prep:
Photo 1: My nails after 4+ weeks of wear. I did this exact same process with this manicure and it lasted PERFECTLY! No lifting and my nails felt really strong. I’m excited to do it again.
Photo 2: Rebalancing with my carbide barrel bit. I like to remove about 80-90% of my previous manicure, leaving about 10-20% to prep on top of. I’m also using the new Erica’s ATA dust collector and it’s incredible!! It’s so powerful for the size.
Photo 3: I love this dual sided cuticle pusher! I push back the skin to open the cuticle pocket and then use the loop side to gently remove and cuticle on the nail around the skin so my bits don’t need to work quite as hard


Photo 1: My new favorite Erica’s ATA diamond bits! These just came out recently and they’re all I’ve been using.
Photo 2: The long flame bit is really gentle for exfoliating cuticle off the nail (which is key to prevent lifting gel), and lifting up the skin around the nail so I can easily clip it off
Photo 3: Post flame bit nail! The skin is lifted and ready to be nipped off. These are my favorite nippers.
Base & Builder Application:


Photo 1: I just got this Kinetics dehydrator which you apply before base gel and it air dries. This is just a little extra insurance that the nail is free of oil so the gel can adhere properly! I like applying it with a brush like this.
Photo 2: I loveee the Kinetics Max Base. I applied a thin even layer all over my nail to help with my builder gel retention. This base is really great for anyone who suffers from frequent lifted gel, it’s literally formulated for difficult nails but works equally well on healthy normal nails too!
I’ve been using the Kinetics Lamp recently and I LOVE IT! It’s a really great price for a cordless lamp too.
Photo 3: One of my favorite things about Kinetics is that all of their product lines come in the same colors. So I’m using thixotropic jelly gel (read more about what this means HERE) and self-leveling builder gel in the same color - Natural Pink!


Photo 1: Armoring the tips & repairing corners with Jelly Gel
Photo 2: Applying the self-leveling builder gel overlay! I am trying out the Kinetics Ceramic Builder Gel which is their hardest soft gel (it can be soaked off)! It reminds me of Nail Thoughts - it’s strong and supportive but self levels really well and is super easy to apply!
Photo 3: After the builder is applied, I like to shape my nails and refine the surface. I also remove some of the natural nail from the tips to ensure there’s no lifting there! I’m using this bit from Erica’s ATA. Read more about this process here too!
Finishing Touches:


Photo 1: I used the Kinetics Smart Top Coat Light which is SUPER THIN! You hardly need any because it flows really fast (I learned the hard way). But it’s so thin which keeps your nails thin in turn, and also shiny and scratch free!
Photo 2: This is my new favorite cuticle product!! It’s a dry oil so it air dries but it’s so hydrating!!! And it has no smell which I enjoy from time to time. I’ve been reaching for this every manicure!
Photo 3: The finished result! I love the light pink shade, I think it looks so natural!
Are you interested in my certification classes?
I am gearing up to host some branded certification classes this summer! If you’re interested in learning more about my Kokoist Double Certification, Nail Thoughts with Erica’s ATA E-Filing Double Certification and NEW Kinetics Certification, enter your email here on this form and I’ll send you a note with more info when they’re ready :) Ps - anyone on the waitlist will receive a special discount when enrolling in the classes!
Leave a comment if you have any questions at all! Thanks for reading and make sure you’re subscribed for weekly notes from me directly in your inbox! 💋